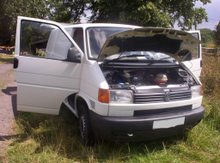
 It stopped raining today, so I finished off the windows and they look great :) It didn't take long to do as I just needed to finish painting the edges and open the Carbond glue. If anyone is wondering how to do it, I just used a screwdriver to pop the end off and then threw the tiny balls away (which I presume absorb moisture in storage). Once I was ready to go I slipped the window edges on, ensuring the join was on the far side and near the top. I then used super glue to join the two edges together.
Next was the bonding stage, so I cut a V into the Carbond nozzle. I then applied it as a continuous triangular band about 1mm from the trim. Once completed I quickly offered the window to the gap I had cut, whilst trying to get it straight first time. I then used my kayaking roof rack straps (which I had sorted prior) and some household objects to hold the corners in place to cure. I think it should be ok to drive in 4hrs but i'm going to leave it overnight just to be sure.
 Clear Indicators
I also swapped the orange indicator lights with clear ones as they arrived today. They took about 1 minute to complete. The old ones pop out with a screwdriver and the new ones slide in. As they are clear I had to also swap the bulbs from clear to orange. These and the side windows make a massive difference to the van!

2 comments:
nice job on the windows, they look really smart, I'm quite impressed :-)
Cheers matey :)
Post a Comment