Tuesday 29 May 2007

Side windows finished

It stopped raining today, so I finished off the windows and they look great :) It didn't take long to do as I just needed to finish painting the edges and open the Carbond glue. If anyone is wondering how to do it, I just used a screwdriver to pop the end off and then threw the tiny balls away (which I presume absorb moisture in storage). Once I was ready to go I slipped the window edges on, ensuring the join was on the far side and near the top. I then used super glue to join the two edges together.
Next was the bonding stage, so I cut a V into the Carbond nozzle. I then applied it as a continuous triangular band about 1mm from the trim. Once completed I quickly offered the window to the gap I had cut, whilst trying to get it straight first time. I then used my kayaking roof rack straps (which I had sorted prior) and some household objects to hold the corners in place to cure. I think it should be ok to drive in 4hrs but i'm going to leave it overnight just to be sure.
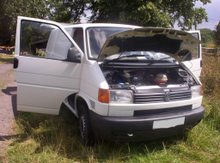
Clear Indicators
I also swapped the orange indicator lights with clear ones as they arrived today. They took about 1 minute to complete. The old ones pop out with a screwdriver and the new ones slide in. As they are clear I had to also swap the bulbs from clear to orange. These and the side windows make a massive difference to the van!

Sunday 27 May 2007

Side window prepared

I had a go at the sliding door window today, despite knowing it might rain later in the day. I managed to cut the hole and prep it before I was forced to cover it with a thick plastic sheet to stop it getting wet.

I used the inner skin of the door as a guide to drill holes in the outer skin (see picture). For some reason each hole caused a burring, which although fine due to me cutting it out anyway, has suggested I should use a smaller/softer drill bit in the future. I then used all the outsides of the holes to draw a cutting template. The more holes in the corners = the more accurate I could get them to be.

I then used my trusty jigsaw to cut around the template. I had planed on doing the straight bits from inside the van but the footprint on the jigsaw was too large to enable me to do this. I tried removing the jigsaws footprint too but it was too dangerous to continue to cut this way. So after masking the edges and footprint, I cut the hole from outside the van. I had wanted to cut from the inside as I have learnt that to get the windows flush, the outer skin needed to be slightly shorter than the existing inner skin to enable you to dress it back later. Something which would be easy to do by angling the blade whilst cutting inside. The plan B was to cut the hole from outside the van and 'angle grind' the outer skin back. This went ok but did take a while to angle grind back. The abandoned plan C was to cut the hole an inch too small, then go around it again with an angled blade. I didn't opt for this option as I was worried about the metal drumming and bending with no support.

I then used a hammer (and spanner) to dress back the edges to about a parallel 4mm gap between the skins, being very careful on the corners. The gap was then filed with the Sikaflex I had left from the sunroof and clamped into place until dry. Once dry I painted it with red oxide and white Hammerite paint to seal and prevent rust. All I need now is a dryer day to get the window in and ensure it sets properly.

Sunday 6 May 2007

Speakers in dash upgraded

I bought some 4" speakers from Macro recently and fitted them in.
It's a simple thing to do. Just pop out the grey cover with a screwdriver, then pop out the speaker.
I had to change the wire plugs to fit the new ones but this was easily done by attaching x2 spades to the cut wires. I used the x3 original clips to then refit and hold it tight in place. I may change the wire to the head/amp at a later date, as i'm told this can make a 'massive' difference too.

(Old on left and new on right)


Truth be told the original VW ones are pretty good but I wanted something a bit better/modern in the front. I'm very impressed a 4" speaker can sound so good.